
Six Pointed Star Block Tutorial // Block #7 // Summer Sampler Series

Welcome to this free tutorial for block #7 of the Summer Sampler Series—the Six-Pointed Star block! hope you love the Summer Sampler as much as I do. While you are here, check out my book, Vintage Quilt Revival, and our most current Summer Sampler Quilt Along.

In 2011, I linked to a hand-pieced quilt that used six-pointed star, diamond, and hexagon paper templates c. 1871. It was most likely made by Susan DeSaussure Kershaw from a pattern that originally ran in the Godey's Lady's Book in September 1864, but the Charleston Museum took down the quilt photo.
"Godey’s Lady’s Book was a magazine marketed specifically to women. Published by Louis A. Godey of Philadelphia from 1830 to 1878 (and after his death until 1898), the issues contained poetry, articles, engravings, sheet music, hand-tinted fashions and needlework crafts. Sarah Josepha Hale (author of Mary Had a Little Lamb) was its editor from 1837 until 1877. When she started, the magazine had a circulation of 10,000 subscribers; two years later it was 40,000 and by 1860 had 150,000 subscribers. Publication continued during the Civil War with little mention of war events or activities and it was extremely difficult to obtain copies in the South." Photo Source: Salem Weekly Advocate, December 22, 1864, Salem, Illinois.
I love this pattern; a quick (or even extensive) search of flickr and google show that there are not a lot of six-pointed star quilts on the internet, let alone tutorials or suggestions for how to make the block. This block is usually made using either English paper piecing (by hand) or y-seams, neither of which sounded fun to me.
So, my version of this block includes equilateral triangles similar to this quilt, and lots of them. Shall we begin?
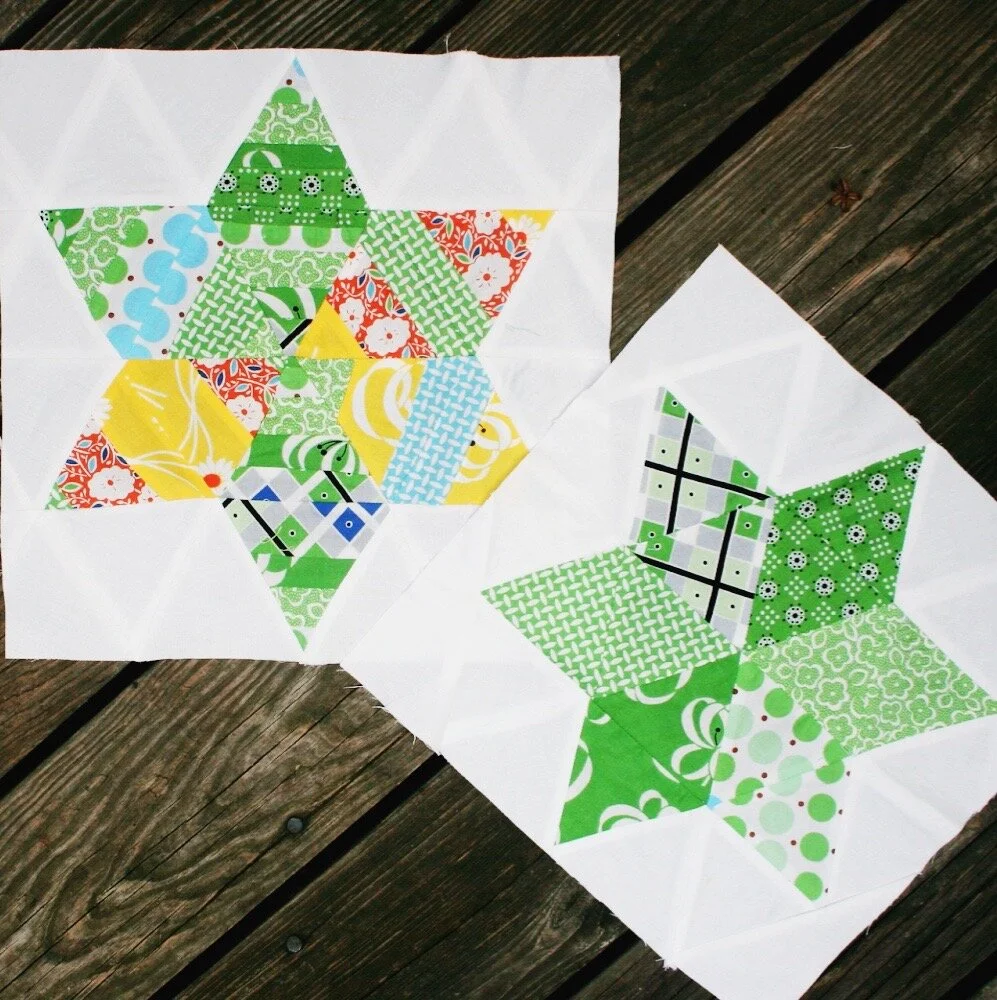
SIX-POINTED STAR BLOCK TUTORIAL
This block looks great with strings, or with single-print equilateral triangles. It would also be stunning in solids.
Download the Triangle Template here. Use a 1/4’’ seam allowance as you sew this block. [Note: as of 5.13.2020, the template still has triangle tips].
Tips before you start piecing
—Use a 1/4’’ seam allowance throughout, and press seams open.
—Use starch when sewing them together, if you want.
—To prevent you from accidentally turning the row around when you are sewing the triangles together, place a pin or a binding clip in the first triangle, near the top.
—Don’t forget, these triangle sides are cut on the bias. Use pins when sewing the triangles together, and avoid manipulating the edges too much when you sew.
Cutting Instructions:
Cut (12) feature triangles
Cut (24) background triangles
Optional: Trace the triangle on template plastic or cardboard (cereal boxes work well)—note that the tip of the triangle template has been cut off, so there is no need to align “dog ears.” Cut a strip that is 3-1/2’’ inches tall x width of fabric. Align the bottom of the template to the bottom of your fabric, and use a rotary cutter and a small ruler to cut on either side of template. Flip the triangle template, and repeat. Or, simply rotary cut around template.

Piecing Triangles:
1. Lay out your triangles according to the diagram above.
2. Sew the triangles together in horizontal rows. Place the first two triangles right sides together, pin, and sew along the edge as shown. Press seams.

3. Take your third triangle and place right sides together along edge of the second triangle. Pin, and sew along the edge.

4. Continue piecing until the first horizontal row of triangles is sewn together. Repeat with rows 2-4.
5. Place rows 1 and 2, right sides together. Pin through each seam where the triangle points meet up--I stick a pin straight through the point at the top of the triangle through both layers of fabric, and then pin. This will help you to sew more precisely just above the top of the triangles.
6. Repeat with rows 3 and 4, taking care to pin and press.

7. Sew the two halves together, taking care to pin and press.

7. Trim your block to 12-1/2’’ x 12-1/2’’ square, as shown in the image above.
Paper-Pieced String Block Alternative
This is a great chance to use up some of your scraps; alternately, you can cut strips to use. I would recommend using three or less strips per triangle. To foundation piece strips, make sure to set your printer to “do not scale,” and shorten your stitch length (I use ~1.5). Paper piece the 12 feature triangles; I would take off the paper before sewing them together.
Summer Sampler Series Block Tutorials
2011 tutorials and 2021 #summersamplerturns10
BLOCK 1: STAR OF VIRGINIA
Original post here
Re-release on Feb. 17, 2021
By Katie
BLOCK 2: GREEK CROSS
Original post here
Re-release on Feb. 24, 2021
By Faith
BLOCK 3: MOSAIC
Original post here
Re-release on March 3, 2021
Tutorial by Lee
BLOCK 4: FLOWER GARDEN PATH
Original post here
Re-release on March 10, 2021
Tutorial by Katie
BLOCK 5: STAR
Original post here
Re-release on March 17, 2021
Tutorial by Faith
BLOCK 6: ARKANSAS TRAVELER
Original post here
Re-release on March 24, 2021
Tutorial by Lee
BLOCK 7: SIX-POINTED STRING STAR
Original post here
Re-release on March 31, 2021
Tutorial by Katie
BLOCK 8: LUCKY PIECES
Original post here
Re-release on April 7, 2021
Tutorial by Faith
BLOCK 9: MINNESOTA
Original post here
Re-release on April 14, 2021
Tutorial by Lee
BLOCK 10: EVENING STAR
Original post here
Re-release on April 21, 2021
Tutorial by Katie
BLOCK 11: ROCKY ROAD TO KANSAS
Original post here
Re-release on April 28, 2021
Tutorial by Faith
BLOCK 12: KANSAS DUST STORM
Original post here
Re-release on May 5, 2021
Tutorial by Lee